To put a net on a basketball hoop, loop the net loop through the rim and push the net through each loop. Pull the net loop down and spread it evenly around the rim.
Discover the art of elevating your basketball game with our comprehensive guide on how to put a net on a basketball hoop. Whether you’re a seasoned player or just starting out, ensuring your hoop is equipped with a net not only adds a professional touch to your setup but also enhances your shooting experience. In this article, we’ll walk you through the step-by-step process of securely attaching a net to your basketball hoop, offering tips and insights to make it a hassle-free endeavor. Get ready to take your home court to the next level and enjoy swish after swish as you sink those perfect shots!
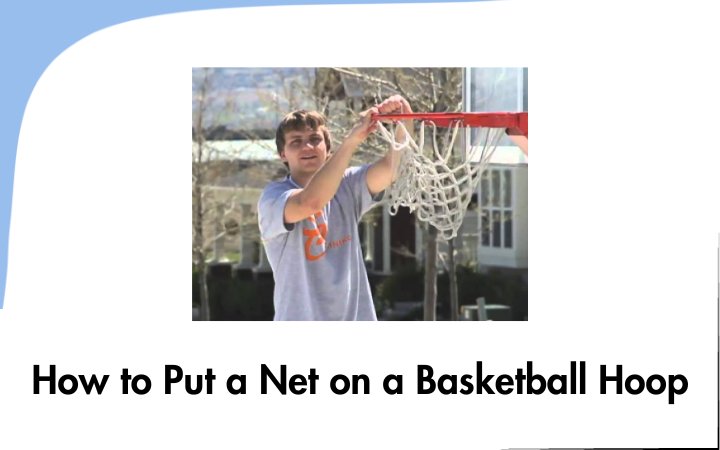
How to Put a Net on a Basketball Hoop
Putting a net on a basketball hoop is a straightforward process that adds a finishing touch to the court and enhances the overall playing experience. Start by positioning yourself directly under the hoop, ensuring safety by using a ladder or step stool if necessary. Hold the net in both hands and locate the looped end, which will be at the top.
Hook this looped end onto the metal hook or rim of the basketball hoop, making sure it’s securely attached. Once the top loop is in place, work your way around the rim, attaching the net’s remaining loops evenly. Ensure the net is taut and evenly distributed, with no bunching or sagging. Finally, give it a test by shooting a few hoops to make sure it hangs straight and functions as it should. Putting a net on a basketball hoop is a simple task that adds an element of authenticity to the game, making it all the more enjoyable for players and spectators alike.
Understanding The Different Types Of Basketball Nets
When it comes to basketball nets, there are various options to choose from. Understanding the different types of basketball nets can help you make an informed decision and find the perfect net for your basketball hoop. In this article, we will explore the different materials used in basketball nets as well as the different styles available.
Different materials used in basketball nets
When it comes to basketball nets, the material used plays a crucial role in its durability and performance. Here are some of the most common materials used in basketball nets:
- Nylon: Nylon nets are the most popular choice among basketball players. They are known for their durability and ability to withstand outdoor conditions. Nylon nets are resistant to fraying and provide a good balance between strength and flexibility.
- Polyester: Polyester nets are another common option. They are known for their resistance to UV rays and moisture, making them ideal for outdoor use. Polyester nets are also durable and have good elasticity.
- Cotton: Cotton nets are less commonly used nowadays due to their lack of durability and susceptibility to weather conditions. They tend to fray easily and may not provide the desired level of performance.
Different styles of basketball nets
In addition to the material used, basketball nets also come in different styles. These styles affect the appearance and functionality of the net. Here are some of the different styles you can choose from:
| Style | Description |
|---|---|
| Standard: | The standard basketball net is the most common style. It features a simple design with evenly spaced loops that attach to the rim. This style is suitable for both indoor and outdoor use. |
| Heavy-duty: | Heavy-duty basketball nets are designed to withstand aggressive play and harsh weather conditions. They are typically made of thicker and more durable materials, ensuring a longer lifespan. |
| Chain: | Chain nets are popular for outdoor basketball courts. They are made of metal chains that create a distinctive sound when the ball goes through the hoop. Chain nets are durable and suitable for outdoor use. |
| Glow-in-the-dark: | Glow-in-the-dark basketball nets are a fun option for playing basketball at night. They are made of materials that absorb light during the day and emit a glow at night, making them visible in low-light conditions. |
Understanding the different types of basketball nets allows you to choose the right net for your needs. Whether you prefer a durable nylon net for outdoor use or a unique glow-in-the-dark net for nighttime games, there is a basketball net available to enhance your playing experience. Make sure to consider the material, style, and intended use of the net when making your selection.
Step 1: Remove The Old Net
Before installing a new net on your basketball hoop, it is important to remove the old net properly. This will ensure a smooth and hassle-free installation process. Follow these steps to remove the old net effortlessly:
Ensure safety by wearing gloves
To protect your hands from any potential injuries, it is recommended to wear gloves while removing the old net. This will provide you with a better grip and prevent any accidents that may occur due to the net’s entanglement or sharp edges.
Untangle and remove any knots or obstructions
Inspect the old net for any knots or obstructions that might hinder the removal process. Using your gloved hands, carefully untangle the knots and remove any debris or objects that have become entangled in the net. This will ensure a clean and obstruction-free surface for attaching the new net.
Detach the net from the hooks or tie cords
Once you have untangled the net, it’s time to detach it from the hooks or tie cords. Depending on the type of net attachment on your basketball hoop, carefully remove the net from the hooks or untie the cords. Take caution to avoid any damage to the rim or the remaining parts of the net. By following these steps, you can easily remove the old net from your basketball hoop. This will provide a clean slate for installing a new net and ensure a seamless basketball playing experience. Stay tuned for the next step in our guide on how to put a net on a basketball hoop – Step 2: Attach the new net. Remember, safety should always be a priority when handling any sporting equipment, so wear gloves to protect your hands and take your time to untangle and remove any knots or obstructions.
Step 2: Prepare The New Net
After inspecting the basketball hoop and removing the old net, it’s time to prepare the new net for installation. This step is crucial to ensure a smooth and successful net installation. Here are the key sub-steps to follow:
Inspect the new net for any defects or damage
Before proceeding with the installation, carefully examine the new net for any defects or damage. Inspecting the net will help avoid unnecessary delays and ensure that you have a net free from any manufacturing flaws. Look for any tears, fraying, or loose threads that may affect the net’s durability. If you notice any defects, consider getting a replacement net from the manufacturer.
Make sure the net is the correct size for your basketball hoop
It’s essential to ensure that the net you have is the correct size for your basketball hoop. Using a net that is too small or too large can affect the hoop’s performance and overall aesthetics. To determine the right size, measure the circumference of the hoop where the net will be attached. Compare this measurement to the net’s packaging or product description to confirm if they align. If there is a mismatch in size, it’s advisable to find a net that fits your basketball hoop perfectly.
Determine the top and bottom of the net
Identifying the top and bottom of the net is crucial for proper installation. It ensures that the net hangs correctly and provides an optimal shooting experience. Look for any labels or tags on the net indicating the top. Additionally, observe the net’s design – the wider end typically goes at the top while the narrower end goes at the bottom. Confirming the correct orientation of the net will prevent any installation mishaps and save time.
Now that you have inspected the new net for any defects, verified its size, and determined the top and bottom, you are ready to move on to the next step of installing the net onto your basketball hoop. By following these instructions diligently, you’ll be well on your way to enjoying improved shooting accuracy and a more exciting basketball experience.
Step 3: Attach The Net To The Rim
Now that you’ve prepared the basketball hoop and positioned the net correctly, it’s time to attach the net to the rim. There are two options you can choose from: using hooks or using tie cords. Let’s take a look at each method and how to execute them.
Option 1: Using hooks
If you have hooks available or if your basketball hoop came with hooks, this is a convenient way to attach the net. Follow these steps:
1. Install the hooks onto the basketball rim
Start by attaching the hooks onto the basketball rim. Make sure the hooks are evenly spaced around the rim for proper net coverage. You can use a screwdriver or any tool provided to secure the hooks in place.
2. Attach the net to the hooks
Take the basketball net and locate the looped end. Carefully place the looped end onto one of the hooks. Repeat this step for each hook, ensuring that the net is evenly distributed.
Make sure to give the net a gentle tug to ensure it is securely attached to the hooks. This will prevent the net from coming loose during games.
Option 2: Using tie cords
If your basketball hoop doesn’t have hooks or if you prefer a different method, you can use tie cords to attach the net.
1. Securely tie the net to the rim using tie cords
Start by grabbing the loose end of the net and aligning it with the rim. Take one of the tie cords and wrap it around the net and the rim, creating a secure knot. Repeat this step for the remaining corners of the net, using one tie cord per corner.
Make sure to tie the cords tightly to prevent the net from coming loose. Give the net a gentle tug to ensure it’s properly secured.
Congratulations! You’ve successfully attached the net to the rim. Take a step back and admire your handiwork. Now you’re ready to enjoy countless hours of basketball fun!
Step 4: Adjust And Tighten The Net
Ensure the net is evenly spread around the rim
Once you have attached the basketball net to the hooks or tie cords, it’s important to ensure that the net is evenly spread around the rim. This will not only improve the overall appearance of the hoop but also ensure that the net hangs freely. To achieve this:
- Stand back and observe the net from a distance to identify any areas where it may be bunched up or unevenly distributed.
- If you notice any uneven sections, gently adjust the net by spreading it out with your hands. Distribute the net evenly by pulling on the sections that may look tighter or bunched up.
- Continue this process until the net is evenly spread around the entire rim, creating a symmetrical and clean look.
Make any necessary adjustments to ensure the net hangs freely
For a basketball net to function properly, it needs to hang freely without any obstructions that may hinder the movement of the ball. To ensure your net hangs freely:
- Inspect the net closely to identify any areas where it may be touching the rim or any other parts of the hoop.
- If you find any spots where the net is touching, gently adjust it by pulling it away from the rim or any other obstructions.
- Make sure that the net is hanging straight down from the rim, with no sections sticking out or leaning inwards.
- By making these necessary adjustments, you’ll ensure that the net hangs freely and allows the ball to pass through smoothly, improving your shooting experience.
Tighten the net to prevent it from sagging or tangling
To prevent the basketball net from sagging or tangling, it’s important to tighten it securely. Follow these steps to tighten the net:
- Start by holding onto the bottom loop of the net and pulling it downwards to remove any slack.
- Continue pulling the net downwards until it is taut and tight against the rim.
- Once the net is pulled tightly, secure it in place by looping the bottom loop around one of the hooks or tie cords.
- You can then repeat this process for each loop of the net, ensuring that the net is securely tightened and won’t sag or tangle during play.
By adjusting and tightening the net properly, you’ll not only improve the aesthetics of your basketball hoop but also ensure that it functions optimally, allowing for a better shooting experience. Remember to regularly check and tighten the net as needed to maintain its proper position and tension.
Step 5: Test The Net
Once you have successfully attached the net on the basketball hoop, it is important to test it to ensure it is securely in place and will not cause any disruptions during gameplay. Testing the net is a crucial step to avoid any accidents or interruptions while playing. There are two simple ways to test the net and make sure it is properly installed.
Give the net a gentle tug to check if it is securely attached
After attaching the net to the basketball hoop, it is essential to give it a gentle tug to check if it is securely attached. This step will help you determine if there are any loose parts or if the net needs additional adjustments. Grab the net firmly and give it a slight pull to see if it stays in place. If the net feels loose or comes off easily, it is necessary to revisit the attachment process and make any necessary adjustments.
Test the net by shooting a few basketballs to see if it affects gameplay
Another way to test the net is by shooting a few basketballs to see if it affects gameplay. Stand a few feet away from the hoop and shoot a few shots to observe if the net stays in place or if it gets tangled with the ball. This test will help ensure that the net does not interfere with the trajectory of the basketball or hinder the flow of the game. If you notice any issues during the test, such as the net getting tangled or the ball not passing through smoothly, it is crucial to make immediate adjustments. Securely attach any loose parts and make sure the net hangs freely without any obstructions.
Make any final adjustments if needed
After testing the net and addressing any issues, make any final adjustments if needed. This step ensures that the net is securely attached and does not cause any disruptions during gameplay. Take the time to double-check all the connections and ensure that each knot, hook, or tie is tight and secure. Once you are satisfied with the net’s installation, you can enjoy playing basketball with the assurance that the net will not come loose or affect your gameplay. Remember, testing the net is a critical step to ensure safety and optimal performance while playing basketball. By following these guidelines, you can confidently install and test a net on a basketball hoop, allowing you to fully enjoy the game.
Frequently Asked Questions Of How To Put A Net On A Basketball Hoop
How Do You Install A Basketball Hoop Net?
To install a basketball hoop net, loop the first net loop through the rim and push the net through each loop. Pull the net down and spread it evenly.
How Do You Install A Basketball Net Without Hooks?
To install a basketball net without hooks, loop the first net loop through the rim and push it through each loop on the rim. Pull the net down and spread it out.
How To Install Little Tikes Basketball Net?
To install a Little Tikes basketball net, loop the first net loop through the rim. Push the net through each loop on the rim. Pull the net down and spread it evenly.
How Do You Tie A Basketball Net With String?
To tie a basketball net with string, loop the string through the basketball rim and pull it until the net is secure.
Conclusion
Installing a net on a basketball hoop is a simple process that can greatly enhance your shooting experience. By following a few easy steps, you can have a net securely attached to your rim in no time. Start by identifying the top and bottom of the net, then apply it to the rim with either hooks or a tie cord.
Make sure the net is evenly spread and secure. If your rim doesn’t have hooks, you can use string or a hookless replacement net. Additionally, you can find various net locks and clips to further secure your net. Remember to remove any old net before installing the new one.
Taking the time to put a net on your basketball hoop will not only improve the aesthetics of the hoop but also give you a satisfying swish every time you make a shot. Get ready to enjoy some high-flying basketball action with a newly installed net!